概要
このチュートリアルでは以下の動画のようなインベーダーゲームを作ることでBevyの基本的な使い方を知ることを目的としています。
Bevyとは

Bevyとは、とてもシンプルなデータ指向設計(ECS)を中心としたの完全無料のオープンソースのゲームエンジンです。ゲームエンジンとは言っても、Unityのようにリッチなエディタがあったりするわけではなく、ただのRust言語のライブラリのようなものです。 言語やデータ指向の設計によりかなり高いパフォーマンスを実現できます。まだバージョン0.18で安定バージョンは出ていませんが、Rust製のゲームエンジンの中では最もメジャーだと思います。
環境構築
以下の手順に従って、開発環境を構築します。検証済み環境以外でも、同様の手順で構築可能です。
検証済み環境
- Windows 11
- Rust 1.92.0
- Bevy 0.18.1
Rustのインストール
公式サイトの手順に従ってインストールしてください。インストールの詳細については、The Rust Programming Language 日本語版が参考になります。
Rust Analyzerのインストール
VSCodeを使用している場合は、拡張機能から「Rust Analyzer」をインストールしてください。コード補完やリアルタイムのエラーチェックが可能になるため、導入を強く推奨します。
Bevyのインストール
後ほど Cargo.toml に Bevy を追記するため、この段階での個別のインストール作業は不要です。
ターミナル(またはコマンドプロンプト)で以下のコマンドを実行し、プロジェクトを作成します。
cargo new invader_tutorial
cd invader_tutorial
作成されたフォルダを、VSCodeなどの任意のテキストエディタで開いてください。
Bevyの追加
Cargo.toml に以下を追記します。
[dependencies]
bevy = "0.18.1"
次に、.cargo/config.toml (フォルダがない場合は作成してください)に以下を追記します。
[target.x86_64-pc-windows-msvc]
linker = "rust-lld.exe"
また、Cargo.toml に以下のプロファイル設定を追加します。
[profile.dev]
opt-level = 1
[profile.dev.package."*"]
opt-level = 3
[features]
dynamic_linking = ["bevy/dynamic_linking"]
これは、ビルド速度を向上させるための設定です。
以上で環境構築は完了です。
ECSとは
ECSは「Entity Component System」の略称で、データ指向の設計手法です。Unityでは「DOTS (Data-Oriented Technology Stack)」の一部として知られています。
- Entity: オブジェクト(個体)を識別するためのIDです。自身はデータや機能を持ちません。
- Component: 属性や状態を保持する「データ」のみの構造体です。
- System: コンポーネントの状態を監視し、更新を行う「ロジック(処理)」です。
従来のOOP(Unity等)との比較
- Entity: UnityのOOPにおける
GameObjectに近い概念ですが、Entity自体は空のコンテナ(ID)に過ぎません。 - Component: UnityのComponentと概念は似ていますが、ECSのComponentはデータのみを持ち、振る舞い(メソッド)を持たないことが大きな特徴です。これにより、実行時の付け替えが非常に高速かつ容易になります。
- System: Unityにおけるスクリプト内の更新ロジックに相当します。特定のコンポーネントを持つEntityを抽出し、一括で処理を行います。
ECSの利点
ECSを採用することで、データがメモリ上に連続して配置されるようになります。これによりCPUのキャッシュ効率が極めて高くなり、大量のオブジェクトを高速に処理することが可能です。また、データと処理が明確に分離されるため、コードの再利用性や保守性が向上するというメリットもあります。
Appの作成
main.rs を以下のように書き換えます。
#![cfg_attr(not(debug_assertions), windows_subsystem = "windows")]
use bevy::prelude::*;

fn main() {
    App::new().add_plugins(DefaultPlugins).run();
}
各行の役割を解説します。
-
1行目: リリースビルド時にコンソールウィンドウを表示させないための設定です。
-
2行目: Bevyで頻繁に使用する機能をまとめた「プレリュード(prelude)」をインポートしています。
-
main関数: プログラムのエントリーポイントです。
App::new()でアプリケーションを初期化し、run()でゲームループを開始します。 -
add_plugins(DefaultPlugins): ウィンドウ表示、キー入力、アセット管理など、ゲームに必要な基本機能をまとめて追加します。
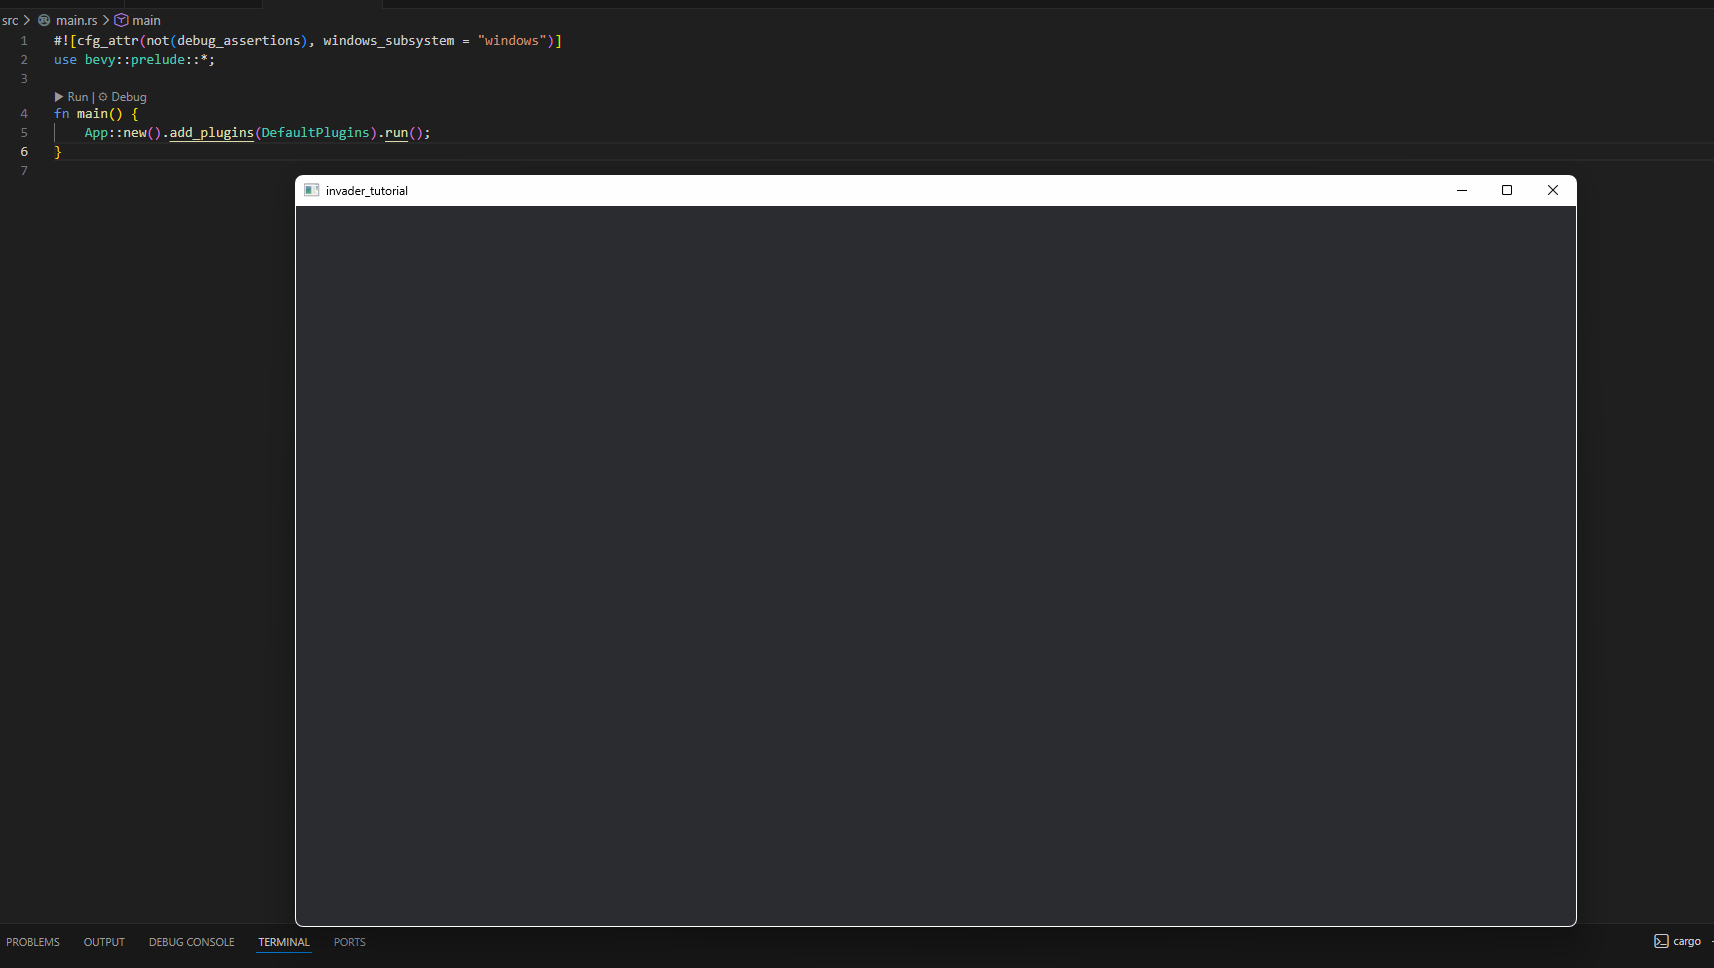
この状態で cargo run を実行すると、空のウィンドウが表示されます。
(※cargo run は、ビルドを行ってから生成されたバイナリを実行するコマンドです。)
Stateの追加
ゲーム内の画面遷移(タイトル画面、プレイ中、結果表示など)を管理するために、src/state.rs を作成して以下の通り記述します。
#![allow(unused)]
fn main() {
use bevy::prelude::*;

#[derive(Clone, Copy, PartialEq, Eq, Hash, Debug, Default, States)]
pub enum GameState {
    /// タイトル画面
    #[default]
    Home,
    /// ゲームプレイ中
    Playing,
    /// 結果表示画面
    Result,
}

pub struct GameStatePlugin;

impl Plugin for GameStatePlugin {
    fn build(&self, app: &mut App) {
        // AppにGameStateを登録
        app.init_state::<GameState>();
    }
}
}GameStateはゲームの現在の状態を表す列挙型です。
#[derive(Clone, Copy, PartialEq, Eq, Hash, Debug, Default, States)]は、GameStateがClone、Copy、PartialEq、Eq、Hash、Debug、Default、Statesトレイトを実装するためのものです。
Statesは、GameStateがゲームの状態であることを示します。
#[default]は、GameStateのデフォルト値をHomeに設定するためのものです。
GameStatePluginはGameStateを初期化するためのプラグインです。プラグインを作るにはPluginトレイトを実装する必要があります。また、buildメソッドを定義する必要があります。buildメソッドの引数appはAppのインスタンスです。このappにGameStateを追加します。
init_state::<GameState>()は、GameStateを初期化するためのメソッドです。
次にmain.rsのappにGameStatePluginを追加します。
#![allow(unused)]
fn main() {
mod state;
}によってstate.rsを読み込みます。
また、appにGameStatePluginを追加します。
#![allow(unused)]
fn main() {
App::new()
    .add_plugins(DefaultPlugins)
    .add_plugins(state::GameStatePlugin) // ← これを追加
    .run();
}
これでGameStateが使えるようになりました。
Home画面(タイトル画面)の作成
Home画面は、アプリ起動時に最初に表示される画面です。中央に配置された Start ボタンをクリックすることで、ゲーム本編(Playing 画面)へと遷移します。
まずは、UIで使用するフォントの準備が必要です。ここでは、fonts/NotoSansJP-Bold.ttf というファイルを src/ 直下に配置して使用します。次に、main.rs の main 関数を以下のように書き換えて、フォントアセットをアプリに埋め込みます。
#![allow(unused)]
fn main() {
let mut app = App::new();
app.add_plugins(DefaultPlugins);

// フォントファイルをバイナリに埋め込み、アセットとして利用可能にする
bevy::asset::embedded_asset!(app, "fonts/NotoSansJP-Bold.ttf");

app.add_plugins(state::GameStatePlugin)
    .add_plugins(home::HomePlugin)
    .run();
}
bevy::asset::embedded_asset! マクロを使用することで、外部ファイルに依存せず実行ファイル単体でフォントを表示できるようになります。
続いて、src/home/mod.rs を作成します。同時に、main.rs でこのモジュールを扱えるよう mod home; を追記してください。
#![allow(unused)]
fn main() {
// src/home/mod.rs
use crate::state;
use bevy::prelude::*;

pub struct HomePlugin;

impl Plugin for HomePlugin {
    fn build(&self, app: &mut App) {
        // ここにシステムを登録していきます
    }
}
}HomePluginをmain.rsのappに追加します。
#![allow(unused)]
fn main() {
app.add_plugins(home::HomePlugin);
}
では、Home画面のUI(Startボタン)を実装していきます。
まずは、UI要素を識別するための StartButton コンポーネントと、ボタンの見た目を定義する関数を作成します。
#![allow(unused)]
fn main() {
#[derive(Component)]
pub struct StartButton;
}
UIの構成(バンドル)を定義する関数を作成します。
#![allow(unused)]
fn main() {
fn start_button_bundle(assets_server: Res<AssetServer>) -> impl Bundle {
    (
        DespawnOnExit(state::GameState::Home), // Home画面から抜けたときにDespawnする
        Node {
            width: percent(100),
            height: percent(100),
            align_items: AlignItems::Center,
            justify_content: JustifyContent::Center,
            ..default()
        },
        // StartButtonはNodeのchildrenとして作る
        children![(
            Button,
            StartButton,
            Node {
                width: percent(20),
                height: percent(10),
                justify_content: JustifyContent::Center,
                align_items: AlignItems::Center,
                border_radius: BorderRadius::MAX,
                ..default()
            },
            BorderColor::all(Color::WHITE),
            BackgroundColor(Color::BLACK),
            children![(
                Text::new("Start"),
                TextFont {
                    font: assets_server
                        .load("embedded://invader_tutorial/fonts/NotoSansJP-Bold.ttf"),
                    font_size: 40.0,
                    ..default()
                },
                TextLayout::new_with_justify(Justify::Center),
                TextColor::BLACK,
            )]
        )],
    )
}
}
このUIレイアウトを、Home画面に遷移したタイミングで生成(スポーン)するように設定します。
#![allow(unused)]
fn main() {
fn setup_home_screen(mut commands: Commands, assets_server: Res<AssetServer>) {
    // spawn a camera
    commands.spawn((
        Camera3d::default(),
        Transform::from_xyz(0.0, 10.0, 0.0).looking_at(Vec3::ZERO, Vec3::Y),
        DespawnOnExit(state::GameState::Home),
    ));
    // spawn UI
    commands.spawn(start_button_bundle(assets_server));
}
}setup_home_screenシステムをHomePluginのbuildメソッドに追加します。
#![allow(unused)]
fn main() {
impl Plugin for HomePlugin {
    fn build(&self, app: &mut App) {
        app.add_systems(OnEnter(state::GameState::Home), setup_home_screen);
    }
}
}
これでStartボタンが表示されるようになりましたが、まだクリックしても反応がありません。そこで、ボタンが押されたことを検知して Playing 状態へ遷移するシステムを実装します。
#![allow(unused)]
fn main() {
type StartButtonInputs = (Changed<Interaction>, With<StartButton>);
fn update_start_button(
    mut query: Query<(&Interaction, &mut BackgroundColor), StartButtonInputs>,
    mut game_state: ResMut<NextState<state::GameState>>,
) {
    for (interaction, mut background_color) in query.iter_mut() {
        match interaction {
            Interaction::Pressed => {
                background_color.0 = Color::srgb(0.5, 0.5, 0.5);
                game_state.set(state::GameState::Playing);
            }
            Interaction::Hovered => {
                background_color.0 = Color::srgb(0.7, 0.7, 0.7);
            }
            Interaction::None => {
                background_color.0 = Color::srgb(0.9, 0.9, 0.9);
            }
        }
    }
}
}update_start_buttonシステムをHomePluginのbuildメソッドに追加します。
#![allow(unused)]
fn main() {
impl Plugin for HomePlugin {
    fn build(&self, app: &mut App) {
        app.add_systems(OnEnter(state::GameState::Home), setup_home_screen)
            .add_systems(
                Update,
                update_start_button.run_if(in_state(state::GameState::Home)),
            );
    }
}
}
これでHome画面が完成しました。
Playing画面の作成
Playing画面は、ゲームがプレイされている画面です。長くなるので、Playing画面全体の流れ、プレイヤー、敵、球、HP、これらで共通して扱うもの、と分けて説明しますが、横断することもあるのでとりあえず以下のファイルを作ってください。
src/playing/mod.rs
src/playing/player.rs
src/playing/enemy.rs
src/playing/bullet.rs
src/playing/hp.rs
src/playing/utils.rs
また、main.rsにmod playing;を追加します。
#![allow(unused)]
fn main() {
mod state;
mod home;
mod playing;
}
Playing画面全体の流れとUIの実装
ここでは、メインのゲームループを管理する PlayingPlugin の作成に加え、一時停止・再開ボタン、スコア表記、ゲームプレイ中のステート管理、およびリザルト画面への遷移を実装します。
まず、playing/mod.rs を作成して PlayingPlugin を用意します。作成したプラグインは、これまでと同様に main.rs の App に登録しておきましょう。
さらに、playing/ フォルダ内にある各サブモジュールを公開し、GameState を利用可能にします。
#![allow(unused)]
fn main() {
pub mod bullet;
pub mod enemy;
pub mod hp;
pub mod player;
pub mod utils;

use crate::state;
}ここで、crate はプロジェクトのルート(src/)を指します。つまり main.rs で定義されている state モジュールを参照しています。
それでは、ゲームプレイ中のUIを構築していきましょう。
playing/mod.rs 内に、UI要素を識別するための各コンポーネントと、ゲーム内の進行状態を管理する InGameState を定義します。
また、UIのレイアウト構造を定義する setup_ui 関数を作成します。ここで hp::HpUI というコンポーネントを使用しますが、これは後ほど playing/hp.rs で実装するため、現時点では定義のみ済ませておいてください。
#![allow(unused)]
fn main() {
#[derive(Component)]
struct UI;

#[derive(Component)]
struct PauseButton;

#[derive(Component)]
struct ResumeButton;

#[derive(Component)]
struct TimeUI;

#[derive(Component)]
struct KillUI;

#[derive(Clone, Copy, PartialEq, Eq, Hash, Debug, Default, States)]
pub enum InGameState {
    #[default]
    Running,
    Paused,
}

fn setup_ui(asset_server: &AssetServer) -> impl Bundle {
    (
        // 親となるUI全体
        UI,
        DespawnOnExit(state::GameState::Playing),
        Node {
            width: percent(100),
            height: percent(100),
            align_items: AlignItems::FlexEnd,
            justify_content: JustifyContent::FlexStart,
            flex_direction: FlexDirection::Column,
            row_gap: px(10.0),
            ..default()
        },
        children![
            (
                // ResumeButton
                Button,
                ResumeButton,
                Node {
                    width: percent(20),
                    height: percent(10),
                    justify_content: JustifyContent::Center,
                    align_items: AlignItems::Center,
                    border_radius: BorderRadius::MAX,
                    ..default()
                },
                BorderColor::all(Color::WHITE),
                BackgroundColor(Color::WHITE),
                children![(
                    Text::new("Resume"),
                    TextFont {
                        font: asset_server.load(
                            "embedded://invader_tutorial/fonts/NotoSansJP-Bold.ttf"
                        ),
                        font_size: 40.0,
                        ..default()
                    },
                    TextLayout::new_with_justify(Justify::Center),
                    TextColor::BLACK,
                )]
            ),
            (
                // PauseButton
                Button,
                PauseButton,
                Node {
                    width: percent(20),
                    height: percent(10),
                    justify_content: JustifyContent::Center,
                    align_items: AlignItems::Center,
                    border_radius: BorderRadius::MAX,
                    ..default()
                },
                BorderColor::all(Color::WHITE),
                BackgroundColor(Color::WHITE),
                children![(
                    Text::new("Pause"),
                    TextFont {
                        font: asset_server.load(
                            "embedded://invader_tutorial/fonts/NotoSansJP-Bold.ttf"
                        ),
                        font_size: 40.0,
                        ..default()
                    },
                    TextLayout::new_with_justify(Justify::Center),
                    TextColor::BLACK,
                )]
            ),
            (
                // TimeUI
                Text::new(""),
                TimeUI,
                TextFont {
                    font: asset_server
                        .load("embedded://invader_tutorial/fonts/NotoSansJP-Bold.ttf"),
                    font_size: 40.0,
                    ..default()
                },
                TextLayout::new_with_justify(Justify::Center),
                TextColor::WHITE,
            ),
            (
                // KillUI
                Text::new(""),
                KillUI,
                TextFont {
                    font: asset_server
                        .load("embedded://invader_tutorial/fonts/NotoSansJP-Bold.ttf"),
                    font_size: 40.0,
                    ..default()
                },
                TextLayout::new_with_justify(Justify::Center),
                TextColor::WHITE,
            ),
            (
                // HpUI
                Text::new(""),
                hp::HpUI,
                TextFont {
                    font: asset_server
                        .load("embedded://invader_tutorial/fonts/NotoSansJP-Bold.ttf"),
                    font_size: 40.0,
                    ..default()
                },
                TextLayout::new_with_justify(Justify::Center),
                TextColor::WHITE,
            ),
        ],
    )
}
}
次に、ゲームの進行情報を保持するための「リソース(Resource)」を定義します。 リソースとは、アプリケーション全体で共有されるシングルトンなデータストレージであり、どのシステムからでも容易にアクセス・変更ができる Bevy の重要な機能です。
#![allow(unused)]
fn main() {
// スコアの構造を定義
// キル数と生存時間から算出する
#[derive(Default, Clone, Copy)]
pub struct Score {
    pub kill: i32,
    pub survival_time: f32,
}
// スコアの計算
impl Score {
    pub fn score(&self) -> f32 {
        (self.kill as f32 * self.survival_time.min(100.0)).sqrt()
    }
}
// スコアを表示するために`score.to_string()`でできる文字列を作る
impl std::fmt::Display for Score {
    fn fmt(&self, f: &mut std::fmt::Formatter<'_>) -> std::fmt::Result {
        f.write_str(&format!(
            "Kill: {}\nSurvival Time: {:.2}\nScore: {:.2}",
            self.kill,
            self.survival_time,
            self.score()
        ))
    }
}

// 現在のスコア
#[derive(Resource)]
pub struct CurrentScore(Score);
// スコアの初期化
fn reset_current_score(current_score: &mut CurrentScore) {
    current_score.0 = Score::default();
}
// 過去のスコアのリスト
#[derive(Resource)]
pub struct ScoreList(pub Vec<Score>);
// 現在のスコアをリストに追加する
fn push_score_list(mut score_list: ResMut<ScoreList>, current_score: Res<CurrentScore>) {
    score_list.0.push(current_score.0);
}
}
また、ゲーム経過時間を管理するためのストップウォッチ機能もリソースとして定義しておきましょう。
#![allow(unused)]
fn main() {
#[derive(Resource, Default)]
pub struct StopWatch {
    time: f32,
    is_running: bool,
}

impl StopWatch {
    pub fn new(run: bool) -> Self {
        Self {
            time: 0.0,
            is_running: run,
        }
    }
    pub fn now(&self) -> f32 {
        self.time
    }
    pub fn start(&mut self) {
        self.is_running = true;
    }
    pub fn pause(&mut self) {
        self.is_running = false;
    }
    pub fn reset(&mut self) {
        self.time = 0.0;
    }
    pub fn is_running(&self) -> bool {
        self.is_running
    }
}

fn update_stopwatch(time: Res<Time>, mut stopwatch: ResMut<StopWatch>) {
    if stopwatch.is_running() {
        stopwatch.time += time.delta_secs();
    }
}

fn start_stopwatch_res(mut stopwatch: ResMut<StopWatch>) {
    stopwatch.reset();
    stopwatch.start();
}
}
定義したリソースを画面上に表示するためのUI更新システムと、一時停止・再開ボタンのインタラクション処理を実装します。
#![allow(unused)]
fn main() {
fn update_time_ui(stopwatch: Res<StopWatch>, mut time_ui_query: Query<&mut Text, With<TimeUI>>) {
    for mut time_ui in &mut time_ui_query {
        let current_time = stopwatch.now();
        **time_ui = format!("Time: {:.2}s / 100s", current_time);
    }
}

fn update_kill_ui(
    current_score: ResMut<CurrentScore>,
    mut kill_ui_query: Query<&mut Text, With<KillUI>>,
) {
    for mut kill_ui in &mut kill_ui_query {
        **kill_ui = format!("Kill: {}", current_score.0.kill);
    }
}

type ResumeButtonInputs = (Changed<Interaction>, With<ResumeButton>);
fn update_resume_button(
    mut query: Query<(&Interaction, &mut BackgroundColor), ResumeButtonInputs>,
    mut stopwatch: ResMut<StopWatch>,
    mut game_state: ResMut<NextState<InGameState>>,
) {
    for (interaction, mut background_color) in query.iter_mut() {
        match interaction {
            Interaction::Pressed => {
                background_color.0 = Color::srgb(0.5, 0.5, 0.5);
                stopwatch.start();
                game_state.set(InGameState::Running);
            }
            Interaction::Hovered => {
                background_color.0 = Color::srgb(0.7, 0.7, 0.7);
            }
            Interaction::None => {
                background_color.0 = Color::srgb(0.9, 0.9, 0.9);
            }
        }
    }
}

type PauseButtonInputs = (Changed<Interaction>, With<PauseButton>);
fn update_pause_button(
    mut query: Query<(&Interaction, &mut BackgroundColor), PauseButtonInputs>,
    mut stopwatch: ResMut<StopWatch>,
    mut game_state: ResMut<NextState<InGameState>>,
) {
    for (interaction, mut background_color) in query.iter_mut() {
        match interaction {
            Interaction::Pressed => {
                background_color.0 = Color::srgb(0.5, 0.5, 0.5);
                stopwatch.pause();
                game_state.set(InGameState::Paused);
            }
            Interaction::Hovered => {
                background_color.0 = Color::srgb(0.7, 0.7, 0.7);
            }
            Interaction::None => {
                background_color.0 = Color::srgb(0.9, 0.9, 0.9);
            }
        }
    }
}
}
最後に、制限時間を超過した際に自動的にリザルト画面へ遷移する判定システムを作成します。
#![allow(unused)]
fn main() {
const TIME_LIMIT: f32 = 100.0;
fn check_time_limit(
    stopwatch: Res<StopWatch>,
    mut current_score: ResMut<CurrentScore>,
    mut game_state: ResMut<NextState<crate::state::GameState>>,
) {
    let current_time = stopwatch.now();
    current_score.0.survival_time = current_time;
    if current_time >= TIME_LIMIT {
        game_state.set(state::GameState::Result);
    }
}
}背景用の画像(例:src/img/invader_background.png)もアセットとして埋め込んでおきましょう。
#![allow(unused)]
fn main() {
bevy::asset::embedded_asset!(app, "img/invader_background.png");
}これらすべての要素を初期化・配置するための、Playing 画面専用のセットアップシステムを定義します。
#![allow(unused)]
fn main() {
fn setup_playing(
    mut commands: Commands,
    asset_server: Res<AssetServer>,
    mut current_score: ResMut<CurrentScore>,
    mut meshes: ResMut<Assets<Mesh>>,
    mut materials: ResMut<Assets<StandardMaterial>>,
) {
    reset_current_score(&mut current_score);
    // spawn a camera
    commands.spawn((
        Camera3d::default(),
        Transform::from_xyz(0.0, 30.0, 0.0).looking_at(Vec3::ZERO, Vec3::Z),
        DespawnOnExit(state::GameState::Playing),
    ));
    // spawn ui
    commands.spawn(setup_ui(&asset_server));
    // spawn background
    commands.spawn((
        Mesh3d(meshes.add(Plane3d::default().mesh().size(50.0, 50.0))),
        MeshMaterial3d(materials.add(
            StandardMaterial {
                base_color_texture:
                    Some(
                        asset_server.load(
                            "embedded://invader_tutorial/img/invader_background.png",
                        ),
                    ),
                unlit: true,
                ..default()
            },
        )),
        Transform::from_xyz(0.0, 0.0, -10.0),
        DespawnOnExit(state::GameState::Playing),
    ));
}
}
最後に、これまでに定義したステート、リソース、および各システムを PlayingPlugin に集約し、App に登録します。
#![allow(unused)]
fn main() {
impl Plugin for PlayingPlugin {
    fn build(&self, app: &mut App) {
        app.insert_resource(StopWatch::new(false))
            .insert_resource(CurrentScore(Score::default()))
            .insert_resource(ScoreList(Vec::new()))
            .init_state::<InGameState>()
            .add_systems(
                OnEnter(state::GameState::Playing),
                (setup_playing, start_stopwatch_res),
            )
            .add_systems(
                Update,
                (
                    update_stopwatch,
                    update_time_ui,
                    update_kill_ui,
                    check_time_limit,
                    update_pause_button,
                    update_resume_button,
                )
                    .run_if(in_state(state::GameState::Playing)),
            )
            .add_systems(OnExit(state::GameState::Playing), push_score_list);
    }
}

}
プレイヤー
プレイヤーが操作するキャラクターを作成します。
はじめに、playing/utils.rsでCharacter、HP、およびControlというコンポーネントを定義します。Controlは速度の計算と保持を行い、それに基づいてTransformを更新するために使用します。本来は既存の物理エンジンライブラリを活用したいところですが、本記事の執筆時点ではBevyのメジャーアップデート直後で、代表的な物理エンジンであるRapierが最新バージョンに対応していませんでした。そのため、今回は簡易的な物理挙動を自作することにします。
#![allow(unused)]
fn main() {
use bevy::{math::NormedVectorSpace, prelude::*};

pub struct UtilPlugin;

impl Plugin for UtilPlugin {
    fn build(&self, app: &mut App) {
        app.add_systems(
            Update,
            (update_velocity).run_if(
                in_state(crate::state::GameState::Playing)
                    .and(in_state(super::InGameState::Running)),
            ),
        );
    }
}

#[derive(Component, PartialEq, Eq, Clone, Copy)]
pub enum Character {
    Player,
    Enemy,
}

#[derive(Component)]
pub struct HP(pub f32);

#[derive(Component, Default)]
pub struct Control {
    pub mass: f32,
    pub force: Vec3,
    pub acceleration: Vec3,
    pub velocity: Vec3,
    pub speed_limit: f32,
}

impl Control {
    pub fn add_force(&mut self, force: Vec3) {
        self.force = force;
    }
    pub fn speed(&self) -> f32 {
        self.velocity.norm()
    }
    pub fn calculate_velocity(&mut self, delta_time: f32) {
        self.acceleration = self.force / self.mass;
        self.velocity += self.acceleration * delta_time;
        if self.speed() >= self.speed_limit {
            self.velocity = self.velocity.normalize() * self.speed_limit;
        }
        self.force = Vec3::ZERO;
    }
}

fn update_velocity(query: Query<(&mut Control, &mut Transform)>, time: Res<Time>) {
    for (mut control, mut transform) in query {
        control.calculate_velocity(time.delta_secs());
        transform.translation += control.velocity * time.delta_secs();
        transform.translation.x = transform.translation.x.clamp(-20.0, 20.0); // x limit
    }
}
}作成したUtilPluginをplaying/mod.rsのAppに追加します。
次に、playing/player.rsを編集します。まずは必要な定数を定義しましょう。
#![allow(unused)]
fn main() {
const PLAYER_FORCE: f32 = 3.0;
const PLAYER_SPEED_LIMIT: f32 = 10.0;
const PLAYER_MAX_HP: f32 = 100.0;
const PLAYER_START_X: f32 = 0.0;
const PLAYER_START_Y: f32 = 0.0;
const PLAYER_START_Z: f32 = -8.0;
}次にPlayerコンポーネントとプレイヤーをスポーンするシステムを作ります。
#![allow(unused)]
fn main() {
use bevy::prelude::*;

// superは親モジュール(ここでは`playing/mod.rs`)を指します。
use super::bullet;
use super::utils::*;

#[derive(Component)]
pub struct Player;

fn spawn_player(
    mut commands: Commands,
    mut meshes: ResMut<Assets<Mesh>>,
    mut materials: ResMut<Assets<StandardMaterial>>,
) {
    commands.spawn((
        DespawnOnExit(crate::state::GameState::Playing),
        Character::Player,
        Player,
        HP(PLAYER_MAX_HP),
        Transform::from_xyz(PLAYER_START_X, PLAYER_START_Y, PLAYER_START_Z).looking_at(Vec3::ZERO, Vec3::Y),
        Mesh3d(meshes.add(Cuboid::new(1.0, 1.0, 1.0))),
        MeshMaterial3d(materials.add(StandardMaterial {
            base_color: Color::BLACK,
            emissive: Color::srgb(0.1, 0.1, 1.0).to_linear(),
            ..default()
        })),
        Control {
            speed_limit: PLAYER_SPEED_LIMIT,
            mass: 1.0,
            ..default()
        },
    ));
}
}
続いて、プレイヤーの入力を受け取ってキャラクターを移動させるシステムを作成します。
#![allow(unused)]
fn main() {
fn move_player(mut query: Query<&mut Control, With<Player>>, keyboard: Res<ButtonInput<KeyCode>>) {
    let mut control = match query.single_mut() {
        Ok(control) => control,
        Err(_) => {
            warn!("Expected exactly one Player entity, but found none or multiple.");
            return;
        }
    };
    if keyboard.pressed(KeyCode::ArrowLeft) || keyboard.pressed(KeyCode::KeyA) {
        control.add_force(Vec3 {
            x: PLAYER_FORCE,
            y: 0.0,
            z: 0.0,
        });
    }
    if keyboard.pressed(KeyCode::ArrowRight) || keyboard.pressed(KeyCode::KeyD) {
        control.add_force(Vec3 {
            x: -PLAYER_FORCE,
            y: 0.0,
            z: 0.0,
        });
    }
}
}
定義したシステムをまとめたプラグインを作成します。
#![allow(unused)]
fn main() {
pub struct PlayerPlugin;

impl Plugin for PlayerPlugin {
    fn build(&self, app: &mut App) {
        app.add_systems(OnEnter(crate::state::GameState::Playing), spawn_player)
            .add_systems(
                Update,
                (move_player).run_if(
                    in_state(crate::state::GameState::Playing)
                        .and(in_state(super::InGameState::Running)),
                ),
            );
    }
}
}playing/mod.rsでこのPlayerPluginを追加するのを忘れないようにしてください。
これでプレイヤーを動かせるようになりました。
弾丸の実装
playing/bullet.rs を作成し、Bullet コンポーネントと関連する定数を定義します。
#![allow(unused)]
fn main() {
use bevy::prelude::*;

use super::utils::*;
use crate::state;

#[derive(Component)]
pub struct Bullet {
    owner: Character,
    velocity: Vec3,
    damage: f32,
}

const BULLET_SPEED: f32 = 30.0;
const PLAYER_BULLET_DAMAGE: f32 = 30.0;
const ENEMY_BULLET_DAMAGE: f32 = 3.0;
const BULLET_COLLISION_RADIUS: f32 = 1.0;
const BULLET_LIFE_TIME: f32 = 0.7;
}
弾丸を移動させるためのシステムを作成します。
#![allow(unused)]
fn main() {
fn move_bullet(query: Query<(&mut Transform, &Bullet)>, time: Res<Time>) {
    for (mut transform, bullet) in query {
        transform.translation += bullet.velocity * time.delta_secs();
    }
}
}
弾丸は発射から一定時間後に消滅させる必要があるため、時間を計測するためのコンポーネントを playing/utils.rs に追加します。
#![allow(unused)]
fn main() {
#[derive(Component)]
pub struct Interval {
    pub time: f32,
    pub interval: f32,
}

impl Interval {
    pub fn tick(&mut self, delta_time: f32) {
        self.time += delta_time;
    }
    pub fn reset(&mut self) {
        self.time = 0.0;
    }
    pub fn is_ready(&self) -> bool {
        self.time >= self.interval
    }
}

fn tick_interval(time: Res<Time>, query: Query<&mut Interval>) {
    for mut interval in query {
        interval.tick(time.delta_secs());
    }
}
}
作成した tick_interval システムを、UtilPlugin の build メソッド内で App に追加しておきます。
#![allow(unused)]
fn main() {
pub struct UtilPlugin;

impl Plugin for UtilPlugin {
    fn build(&self, app: &mut App) {
        app.add_systems(
            Update,
            (tick_interval, update_velocity).run_if(
                in_state(crate::state::GameState::Playing)
                    .and(in_state(super::InGameState::Running)),
            ),
        );
    }
}
}続いて、playing/bullet.rs に弾丸を生成(スポーン)するための関数を定義します。
#![allow(unused)]
fn main() {
pub fn spawn_bullet(
    commands: &mut Commands,
    owner: Character,
    translation: Vec3,
    forward: Dir3,
    meshes: &mut Assets<Mesh>,
    materials: &mut Assets<StandardMaterial>,
) {
    let (color, damage) = match owner {
        Character::Player => (Color::srgb(0.0, 1.0, 1.0), PLAYER_BULLET_DAMAGE),
        Character::Enemy => (Color::srgb(1.0, 0.0, 1.0), ENEMY_BULLET_DAMAGE),
    };
    commands.spawn((
        Bullet {
            owner,
            velocity: forward.normalize() * BULLET_SPEED,
            damage,
        },
        super::utils::Interval {
            time: 0.0,
            interval: BULLET_LIFE_TIME,
        },
        DespawnOnExit(state::GameState::Playing),
        Transform::from_translation(translation).looking_to(forward, Vec3::Y),
        Mesh3d(meshes.add(Cuboid::new(0.2, 0.2, 1.0))),
        MeshMaterial3d(materials.add(StandardMaterial {
            base_color: Color::BLACK,
            emissive: color.to_linear(),
            ..default()
        })),
    ));
}
}
弾丸とキャラクターの衝突判定を行うシステムを作成します。
#![allow(unused)]
fn main() {
fn bullet_collision(
    mut commands: Commands,
    bullet_query: Query<(Entity, &Transform, &Bullet)>,
    mut character_query: Query<(&Transform, &Character, &mut HP)>,
) {
    for (bullet_entity, bullet_transform, bullet) in bullet_query {
        for (character_transform, character, mut hp) in character_query.iter_mut() {
            if *character == bullet.owner {
                continue;
            }
            let distance_sq = bullet_transform
                .translation
                .distance_squared(character_transform.translation);
            if distance_sq <= BULLET_COLLISION_RADIUS * BULLET_COLLISION_RADIUS {
                hp.0 -= bullet.damage;
                commands.entity(bullet_entity).despawn();
                break ;
            }
        }
    }
}
}
生存期間(Interval)が終了した弾丸を自動的に削除するシステムを作成します。
#![allow(unused)]
fn main() {
fn remove_time_out_bullet(
    mut commands: Commands,
    bullet_query: Query<(Entity, &super::utils::Interval), With<Bullet>>,
) {
    for (entity, interval) in bullet_query {
        if interval.is_ready() {
            commands.entity(entity).despawn();
        }
    }
}
}
BulletPlugin を作成し、これまで定義したシステムを登録します。
#![allow(unused)]
fn main() {
pub struct BulletPlugin;

impl Plugin for BulletPlugin {
    fn build(&self, app: &mut App) {
        app.add_systems(
            Update,
            (bullet_collision, move_bullet, remove_time_out_bullet).run_if(
                in_state(crate::state::GameState::Playing)
                    .and(in_state(super::InGameState::Running)),
            ),
        );
    }
}
}
作成した BulletPlugin を playing/mod.rs に追加するのを忘れないようにしてください。
最後に、プレイヤーがスペースキーを押した時に弾丸を発射できるよう、playing/player.rs に発射システムを追加します。
#![allow(unused)]
fn main() {
fn shoot(
    mut commands: Commands,
    query: Query<(&Transform, &Character), With<Player>>,
    keyboard: Res<ButtonInput<KeyCode>>,
    mut meshes: ResMut<Assets<Mesh>>,
    mut materials: ResMut<Assets<StandardMaterial>>,
) {
    for (transform, &owner) in query {
        if keyboard.just_pressed(KeyCode::Space) {
            bullet::spawn_bullet(
                &mut commands,
                owner,
                transform.translation,
                transform.forward(),
                &mut meshes,
                &mut materials,
            );
        }
    }
}
}
作成した shoot システムを PlayerPlugin にも登録しましょう。
#![allow(unused)]
fn main() {
pub struct PlayerPlugin;

impl Plugin for PlayerPlugin {
    fn build(&self, app: &mut App) {
        app.add_systems(OnEnter(crate::state::GameState::Playing), spawn_player)
            .add_systems(
                Update,
                (move_player, shoot).run_if(
                    in_state(crate::state::GameState::Playing)
                        .and(in_state(super::InGameState::Running)),
                ),
            );
    }
}
}
これで弾丸の発射までできるようになりました。
敵キャラクターの実装
playing/enemy.rs を作成し、Enemy コンポーネントと関連する定数を定義します。
#![allow(unused)]
fn main() {
#[derive(Component)]
pub struct Enemy;

const SHOOT_RATE: i32 = 3;
const SHOOT_CHANCE_MAX: i32 = 10;
const SHOOT_INTERVAL: f32 = 0.3;
const ENEMY_MAX_HP: f32 = 100.0;

const ENEMY_SPAWN_X_RANGE: std::ops::RangeInclusive<i32> = -9..=9;
const ENEMY_SPAWN_Y: f32 = 0.0;
const ENEMY_SPAWN_Z: f32 = 10.0;

const ENEMY_SPEED_LIMIT: f32 = 2.0;
}
敵を生成するための spawn_enemy 関数を定義します。
#![allow(unused)]
fn main() {
fn spawn_enemy(
    commands: &mut Commands,
    meshes: &mut Assets<Mesh>,
    materials: &mut Assets<StandardMaterial>,
    translation: Vec3,
) {
    let mut rng = rand::rng();
    commands.spawn((
        DespawnOnExit(crate::state::GameState::Playing),
        Character::Enemy,
        Enemy,
        super::utils::Interval {
            time: 0.0,
            interval: SHOOT_INTERVAL,
        },
        HP(ENEMY_MAX_HP),
        Transform::from_translation(translation).looking_to(-Vec3::Z, Vec3::Y),
        Mesh3d(meshes.add(Cuboid::new(1.0, 1.0, 1.0))),
        MeshMaterial3d(materials.add(StandardMaterial {
            base_color: Color::BLACK,
            emissive: Color::srgb(1.0, 0.1, 0.1).to_linear(),
            ..default()
        })),
        Control {
            speed_limit: ENEMY_SPEED_LIMIT,
            mass: 1.0,
            velocity: Vec3 {
                x: rng.random_range(-1.0..1.0),
                y: 0.0,
                z: rng.random_range(-1.0..0.0),
            },
            ..default()
        },
    ));
}
}
また、ランダムな位置へのスポーン関数と、ゲーム開始時の初期配置を行うシステムを定義します。 ランダムスポーンは、敵が撃破された際や画面外へ消えた際のリスポーンに使用します。
乱数生成を行うために、rand クレートを追加しましょう。Cargo.toml の [dependencies] に以下を追記します。
rand = "0.10.1"
#![allow(unused)]
fn main() {
use rand::prelude::*;
pub fn spawn_random_enemy(
    commands: &mut Commands,
    meshes: &mut Assets<Mesh>,
    materials: &mut Assets<StandardMaterial>,
) {
    let mut rng = rand::rng();
    let x = rng.random_range(ENEMY_SPAWN_X_RANGE);
    spawn_enemy(
        commands,
        meshes,
        materials,
        Vec3 {
            x: x as f32,
            y: ENEMY_SPAWN_Y,
            z: ENEMY_SPAWN_Z,
        },
    );
}

fn setup_enemies(
    mut commands: Commands,
    mut materials: ResMut<Assets<StandardMaterial>>,
    mut meshes: ResMut<Assets<Mesh>>,
) {
    for i in -3..=3 {
        spawn_enemy(
            &mut commands,
            &mut meshes,
            &mut materials,
            Vec3 {
                x: (i * 3) as f32,
                y: ENEMY_SPAWN_Y,
                z: ENEMY_SPAWN_Z,
            },
        );
    }
}
}
画面外(移動範囲外)に出た敵を削除し、代わりに新しい敵をランダムな位置にスポーンさせます。
#![allow(unused)]
fn main() {
const ENEMY_X_LIMIT: f32 = 19.0;
const ENEMY_NEG_X_LIMIT: f32 = -19.0;
const ENEMY_Z_LIMIT: f32 = 15.0;
const ENEMY_NEG_Z_LIMIT: f32 = -6.0;

fn delete_out_of_range_enemy(
    query: Query<(&Transform, Entity), With<Enemy>>,
    mut commands: Commands,
    mut materials: ResMut<Assets<StandardMaterial>>,
    mut meshes: ResMut<Assets<Mesh>>,
) {
    for (translation, entity) in query
        .iter()
        .map(|(transform, entity)| (transform.translation, entity))
    {
        let x = translation.x;
        let z = translation.z;
        if !(ENEMY_NEG_X_LIMIT..=ENEMY_X_LIMIT).contains(&x)
            || !(ENEMY_NEG_Z_LIMIT..=ENEMY_Z_LIMIT).contains(&z)
        {
            commands.entity(entity).despawn();
            spawn_random_enemy(&mut commands, &mut meshes, &mut materials);
        }
    }
}
}
敵が一定間隔で一定確率で弾丸を発射するシステムを作成します。
#![allow(unused)]
fn main() {
fn enemy_shoot(
    mut commands: Commands,
    query: Query<(&Transform, &Character, &mut super::utils::Interval), With<Enemy>>,
    mut meshes: ResMut<Assets<Mesh>>,
    mut materials: ResMut<Assets<StandardMaterial>>,
) {
    for (transform, &owner, mut interval) in query {
        let mut rng = rand::rng();
        let random_val = rng.random_range(0..SHOOT_CHANCE_MAX);
        let is_ready = interval.is_ready();
        if is_ready {
            interval.reset();
        }
        if is_ready && random_val <= SHOOT_RATE {
            super::bullet::spawn_bullet(
                &mut commands,
                owner,
                transform.translation,
                transform.forward(),
                &mut meshes,
                &mut materials,
            );
        }
    }
}
}
作成したシステムを EnemyPlugin にまとめ、アプリケーションに登録します。
#![allow(unused)]
fn main() {
use super::utils::*;
use bevy::prelude::*;
use rand::prelude::*;
pub struct EnemyPlugin;

impl Plugin for EnemyPlugin {
    fn build(&self, app: &mut App) {
        app.add_systems(OnEnter(crate::state::GameState::Playing), setup_enemies)
            .add_systems(
                Update,
                (enemy_shoot, delete_out_of_range_enemy).run_if(
                    in_state(crate::state::GameState::Playing)
                        .and(in_state(super::InGameState::Running)),
                ),
            );
    }
}
}
HPと死亡処理の実装
HPを表示するUIの更新と、HPが0になった際の判定を行うシステムを実装します。
まずは、プレイヤーのHP UIの更新と、HPが0になった時のリザルト画面への遷移を処理するシステムを作成します。
#![allow(unused)]
fn main() {
use crate::playing::CurrentScore;

use super::utils::*;
use bevy::prelude::*;

#[derive(Component)]
pub struct HpUI;

pub fn update_player_hp(
    mut commands: Commands,
    mut ui_query: Query<&mut Text, With<HpUI>>,
    player: Query<(Entity, &HP), With<super::player::Player>>,
    mut game_state: ResMut<NextState<crate::state::GameState>>,
) {
    let mut ui = match ui_query.single_mut() {
        Ok(ui) => ui,
        Err(_) => {
            warn!("Expected exactly one HP UI entity, but found none or multiple.");
            return;
        }
    };
    let (player_entity, hp) = match player.single() {
        Ok(p) => p,
        Err(_) => {
            warn!("Expected exactly one Player entity, but found none or multiple.");
            return;
        }
    };
    **ui = format!("HP: {}", hp.0);
    if hp.0 <= 0.0 {
        commands.entity(player_entity).despawn();
        game_state.set(crate::state::GameState::Result);
    }
}
}
次に、敵のHPを監視し、0になった場合にデスポーン(消去)してスコアを加算するシステムを作成します。
#![allow(unused)]
fn main() {
pub fn handle_enemy_death(
    mut commands: Commands,
    query: Query<(Entity, &HP, &Character)>,
    mut materials: ResMut<Assets<StandardMaterial>>,
    mut meshes: ResMut<Assets<Mesh>>,
    mut current_score: ResMut<CurrentScore>,
) {
    for (entity, hp, &character) in query {
        if character == Character::Player {
            continue;
        }
        if hp.0 <= 0.0 {
            commands.entity(entity).despawn();
            if character == Character::Enemy {
                current_score.0.kill += 1;
                super::enemy::spawn_random_enemy(&mut commands, &mut meshes, &mut materials);
            }
        }
    }
}
}
これらのシステムを HpPlugin に登録します。
#![allow(unused)]
fn main() {
use crate::state;

pub struct HpPlugin;

impl Plugin for HpPlugin {
    fn build(&self, app: &mut App) {
        app.add_systems(
            Update,
            (update_player_hp, handle_enemy_death).chain().run_if(
                in_state(state::GameState::Playing).and(in_state(super::InGameState::Running)),
            ),
        );
    }
}
}他のプラグインと同様に、playing/mod.rs にこの HpPlugin を追加するのを忘れないようにしてください。
Result画面(結果表示)の作成
リザルト画面は、今回のスコア表示、これまでのスコア履歴(ランキング形式)、およびタイトル画面へ戻るためのリトライボタンで構成されます。まずは、src/result/mod.rs を作成しましょう。
リザルト画面のUIを初期化するシステムを実装します。
#![allow(unused)]
fn main() {
use crate::playing::{Score, ScoreList};
use crate::state;
use bevy::prelude::*;

#[derive(Component)]
struct RetryButton;

#[derive(Component)]
struct ResultText;

fn setup_result_ui(commands: &mut Commands, asset_server: &AssetServer, score_list: &ScoreList) {
    let mut score_score_list = String::from("Ranking\n");
    let mut sorted_score_list = score_list.0.clone();
    sorted_score_list.sort_by(|a, b| a.score().partial_cmp(&b.score()).expect("NaN in Score"));
    sorted_score_list
        .iter()
        .rev()
        .map(|score| score.score())
        .enumerate()
        .for_each(|(rank, score)| {
            score_score_list.push_str(&format!("No. {}: {:.2}\n", rank + 1, score))
        });
    commands.spawn((
        DespawnOnExit(state::GameState::Result),
        Node {
            width: percent(100),
            height: percent(100),
            align_items: AlignItems::Center,
            justify_content: JustifyContent::Center,
            flex_direction: FlexDirection::Column,
            row_gap: px(10.0),
            ..default()
        },
        children![
            (
                Text::new(score_list.0.last().unwrap_or(&Score::default()).to_string()),
                ResultText,
                TextFont {
                    font: asset_server
                        .load("embedded://invader_tutorial/fonts/NotoSansJP-Bold.ttf"),
                    font_size: 40.0,
                    ..default()
                },
                TextLayout::new_with_justify(Justify::Center),
                TextColor::WHITE,
            ),
            (
                Button,
                RetryButton,
                Node {
                    width: percent(20),
                    height: percent(10),
                    justify_content: JustifyContent::Center,
                    align_items: AlignItems::Center,
                    border_radius: BorderRadius::MAX,
                    ..default()
                },
                BorderColor::all(Color::WHITE),
                BackgroundColor(Color::WHITE),
                children![(
                    Text::new("Retry"),
                    TextFont {
                        font: asset_server.load(
                            "embedded://invader_tutorial/fonts/NotoSansJP-Bold.ttf"
                        ),
                        font_size: 40.0,
                        ..default()
                    },
                    TextLayout::new_with_justify(Justify::Center),
                    TextColor::BLACK,
                )]
            ),
            (
                Text::new(score_score_list),
                ResultText,
                TextFont {
                    font: asset_server
                        .load("embedded://invader_tutorial/fonts/NotoSansJP-Bold.ttf"),
                    font_size: 40.0,
                    ..default()
                },
                TextLayout::new_with_justify(Justify::Center),
                TextColor::WHITE,
            ),
        ],
    ));
}

fn setup_result_screen(
    mut commands: Commands,
    asset_server: Res<AssetServer>,
    score_list: Res<ScoreList>,
) {
    // spawn a camera
    commands.spawn((
        Camera3d::default(),
        Transform::from_xyz(0.0, 30.0, 0.0).looking_at(Vec3::ZERO, Vec3::Z),
        DespawnOnExit(state::GameState::Result),
    ));
    setup_result_ui(&mut commands, &asset_server, &score_list);
}
}
リトライボタンが押された際にタイトル画面(Home)へ戻るためのシステムを作成します。
#![allow(unused)]
fn main() {
type RetryButtonInputs = (Changed<Interaction>, With<RetryButton>);
fn update_retry_button(
    mut query: Query<(&Interaction, &mut BackgroundColor), RetryButtonInputs>,
    mut game_state: ResMut<NextState<state::GameState>>,
) {
    for (interaction, mut background_color) in query.iter_mut() {
        match interaction {
            Interaction::Pressed => {
                background_color.0 = Color::srgb(0.5, 0.5, 0.5);
                game_state.set(state::GameState::Home);
            }
            Interaction::Hovered => {
                background_color.0 = Color::srgb(0.7, 0.7, 0.7);
            }
            Interaction::None => {
                background_color.0 = Color::srgb(0.9, 0.9, 0.9);
            }
        }
    }
}
}
これらのシステムをまとめて管理する ResultPlugin を作成します。
#![allow(unused)]
fn main() {
pub struct ResultPlugin;

impl Plugin for ResultPlugin {
    fn build(&self, app: &mut App) {
        app.add_systems(OnEnter(state::GameState::Result), setup_result_screen)
            .add_systems(
                Update,
                update_retry_button.run_if(in_state(state::GameState::Result)),
            );
    }
}
}
最後に、この ResultPlugin を main.rs に登録します。これですべての画面の実装が揃いました! 最終的な main.rs の内容は以下の通りです。
#![cfg_attr(not(debug_assertions), windows_subsystem = "windows")]
use bevy::prelude::*;
mod home;
mod state;
mod playing;
mod result;

fn main() {
    let mut app = App::new();
    app.add_plugins(DefaultPlugins);
    bevy::asset::embedded_asset!(app, "fonts/NotoSansJP-Bold.ttf");
    bevy::asset::embedded_asset!(app, "img/invader_background.png");
    app.add_plugins(state::GameStatePlugin)
        .add_plugins(home::HomePlugin)
        .add_plugins(playing::PlayingPlugin)
        .add_plugins(result::ResultPlugin)
        .run();
}
これで完成です。お疲れ様でした。